A LITTLE GUIDANCE. A LOT OF POSSIBILITIES.
Make yourself at home.
Your guide to building, teaching, and reusing your digital classroom.
START HERE
Your first Wall
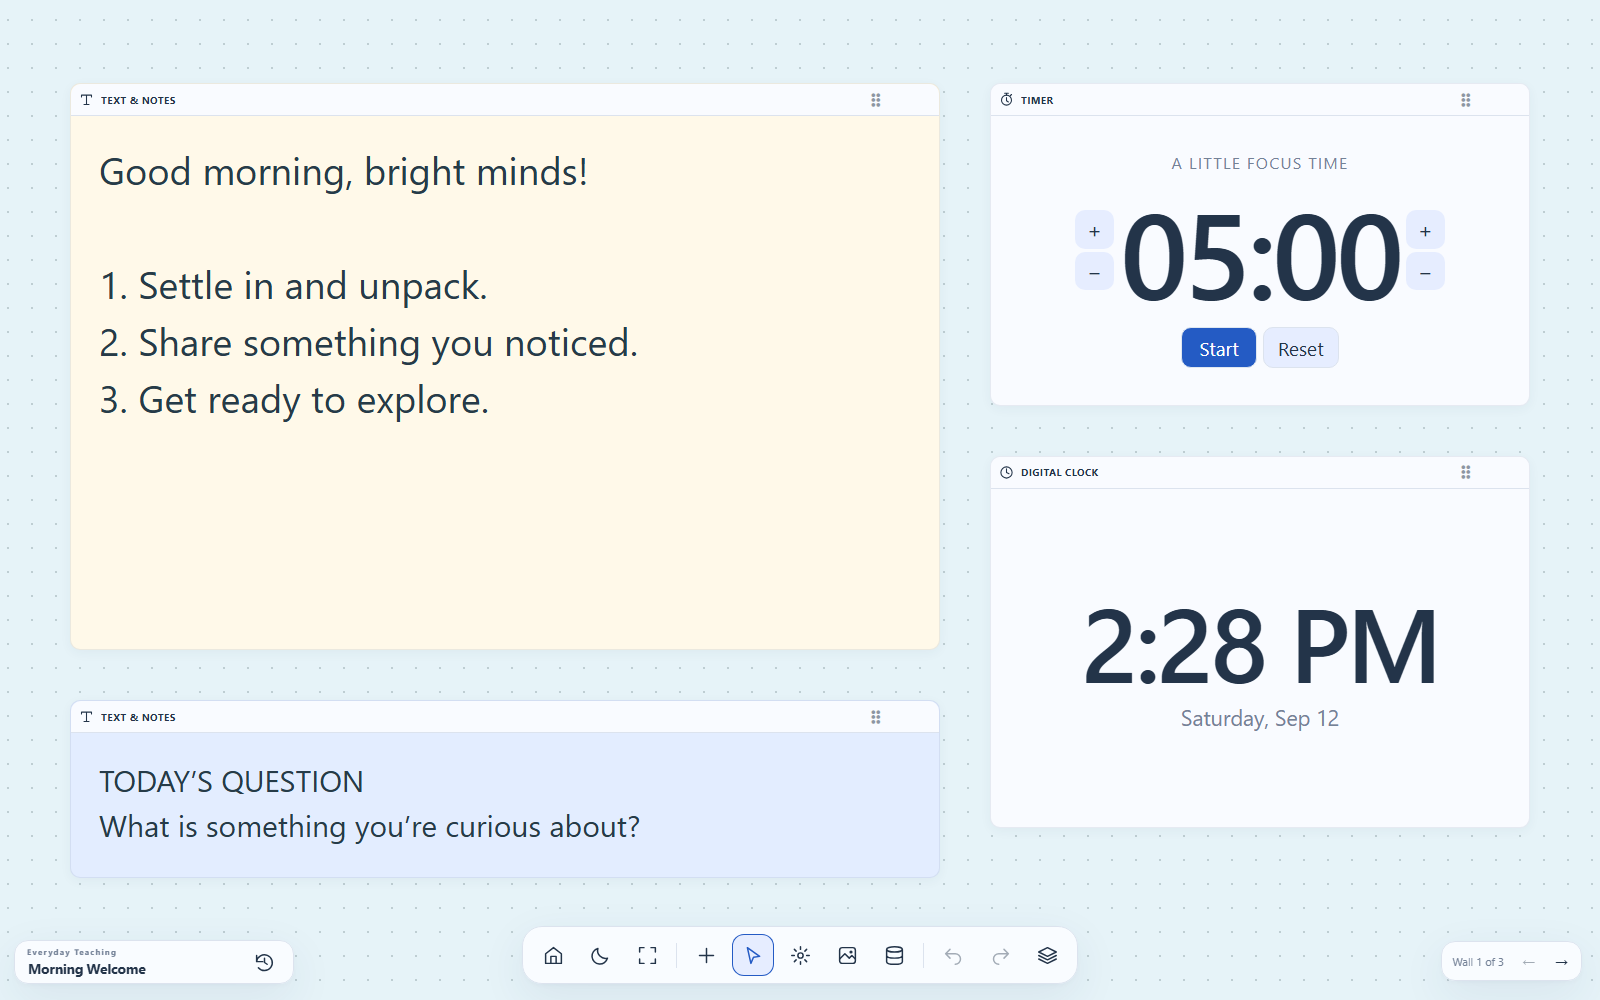
A Wall is your teaching space. Add tools, arrange them for your lesson, and return to the same setup later. You do not need an account.
- Launch My Classroom Wall and open Rooms & Walls using the home icon on the main toolbar.
- Choose New Wall, enter a name, and save it. Pressing Enter also submits the name.
- Open your Wall and select the + on the main toolbar to open Build Your Wall.
- Choose a tool. Try Text & Notes for instructions and Timer for an activity.
- Move and resize the tools to suit your lesson. Changes are saved in this browser on this device.
Before teaching, create a Saved State so you can return to your clean starting point.
Working with tools
Select a tool to bring it to the front and show its own toolbar. Toolbars use icons to keep more of your Wall available for teaching. Hover over a button with a mouse to see its label.
- Move and resize: use the window’s drag handle and corner resize control.
- Focus and restore: use Focus to expand a tool into the available workspace, then restore it to its previous size.
- Active Tools: the stacked-layers button at the right of the main toolbar opens a list of the Wall’s tools. Select a name to activate it, use the eye to show or hide it, or remove it from the list.
- Undo and redo: use the curved arrows on the main toolbar to step through supported editing changes.
- Theme and fullscreen: the main toolbar includes light/dark mode and fullscreen/restore controls.
Rooms & Walls
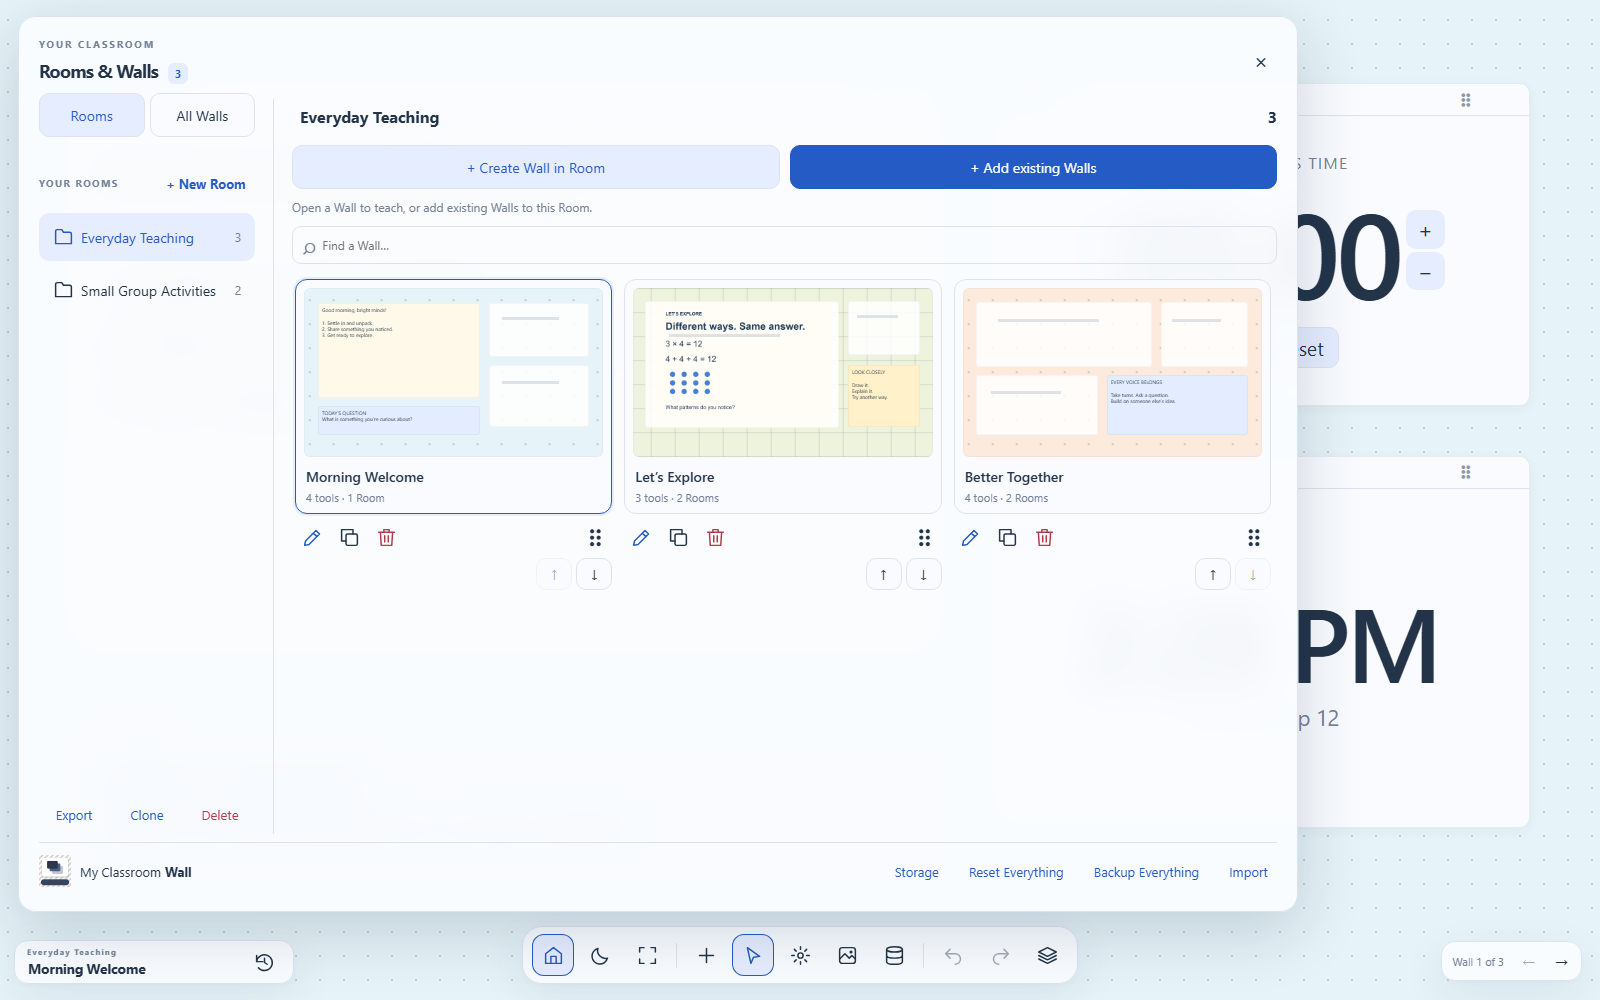
Think of Rooms as folders containing shortcuts to Walls. A Wall can belong to several Rooms, and edits to that Wall appear wherever you open it.
- Use New Room to create a Room. Select it to see its Walls.
- Choose Add existing Walls to include Walls you have already made.
- Edit the Room’s title at the top of its Wall collection to rename it.
- In a Room, a Wall’s delete action removes its shortcut from that Room. In All Walls, deleting a Wall removes the Wall itself.
- Use categories in All Walls to organize your collection.
- Clone a Wall when you want a separate version to edit. Cloning a Room copies its Wall shortcuts, so those Walls remain shared.
Drawing & annotations
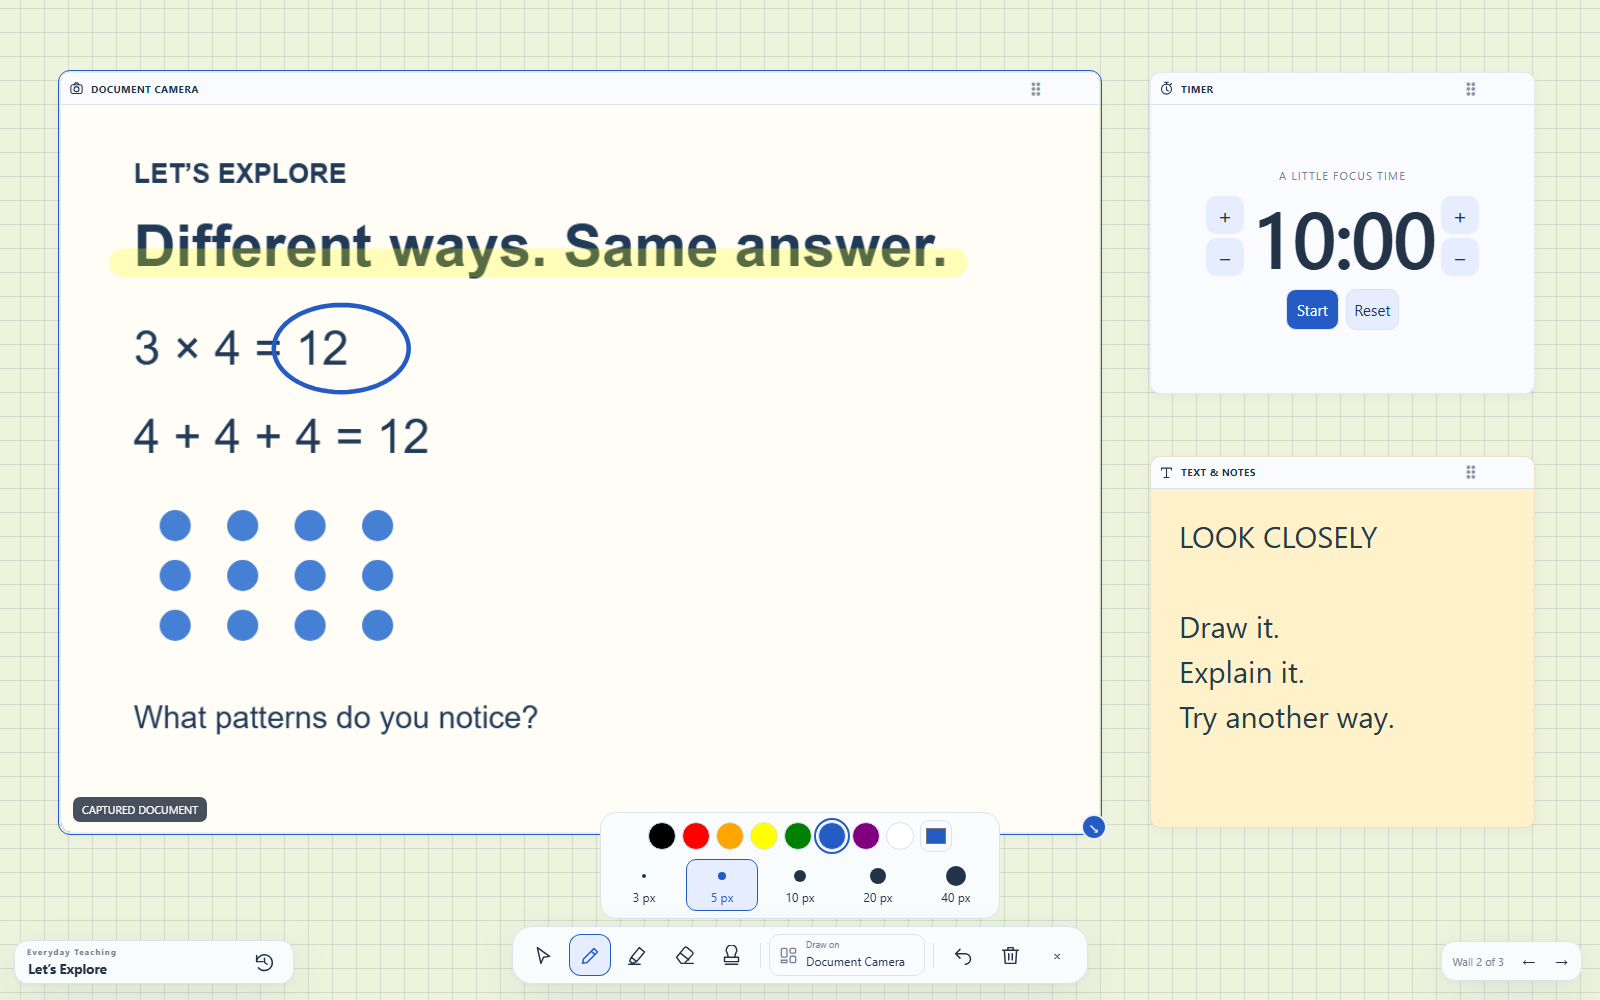
Select a tool that supports drawing, such as Whiteboard, Image, or Document Camera. Choose its pencil button to open the annotation controls in the main toolbar.
Choose pencil, highlighter, eraser, or stamps. Set the color and size, then draw with a mouse, pen, or touch. Click the active drawing tool again to tuck away its options while keeping it selected.
Annotations belong to the selected tool. Tools such as Clock and Timer do not provide a drawing surface. Return to the pointer when you want to select and arrange tools again.
Backgrounds
Choose the background button on the main toolbar to change your Wall’s appearance. Use solid colors, patterns, or open the background image library to choose a picture.
You can add custom images to the background library. This library is separate from the Image and Image Slideshow tools, which display pictures inside movable windows.
Data Sources
Save reusable lists through Data Sources on the main toolbar, next to Backgrounds. Create a source, give it a recognizable name, and enter items one per line or as comma-separated values. The list supports search, cloning, deletion, import, and export.
In a tool such as Randomizer, Spinner Wheel, or Group Maker, use its data-source button to choose a saved list.
Question-and-answer activities
Flashcards and Memory Match use pairs. Put each question and answer on the same CSV row:
question,answer
What planet do we live on?,Earth
What is frozen water?,Ice
"What is 2, plus 2?",4
Wrap a field in quotation marks when it contains a comma. The same source can be used by both activities.
Saved States
Save a clean version of a Wall or Room before a class. A state records the layout, tool content, and annotations so you can return to that starting point.
- Open Saved States beside the Wall title at the bottom left.
- Choose the Wall or Room scope, name the state, and select Create.
- After teaching, open the panel and choose Revert for the state you want to restore.
Reverting replaces the current setup with that saved version. If you want to keep today’s work, create another state first. Shared Walls restored through a Room also change in other Rooms that reference them.
Saved States stay in the browser with your work. They are not a replacement for a downloaded backup.
Import, export & backups
Open Rooms & Walls to find the sharing and backup controls.
- Share one Wall: export it from the All Walls collection.
- Share a Room: select the Room and choose Export.
- Keep everything: choose Backup Everything to download your Rooms, Walls, and custom content.
- Import: use the Import button to select a supported Wall, Room, or complete backup file. Use this same control for future library templates.
To move to another device or browser, transfer your downloaded backup there, open the app, and import it. Your work does not automatically sync between browsers or devices.
Dictionary and Thesaurus use FreeDictionaryAPI.com for online English lookups. Word data comes from Wiktionary under CC BY-SA 4.0; source links are included with results.
Cameras & online content
Document Camera includes camera selection, zoom, rotation, capture, and annotation tools. Webcam provides a simpler live feed. When connecting, select the camera you want and allow browser access when prompted.
The Noise Level tool needs microphone permission. Connect through its microphone control, then drag the handle on the meter to set your classroom threshold.
Use Image, Image Slideshow, and PDF to load your own materials. YouTube and Google Doc show supported online content and need an internet connection. Google documents still follow their sharing permissions; a preview link does not make a private document public.
Storage & troubleshooting
Your work is stored locally in your browser, including IndexedDB for larger content. Open Storage in Rooms & Walls for information about usage.
My work is missing on another device.
Local storage belongs to the browser and site where you created it. Open the original browser and download Backup Everything, then import that file on the new device.
The camera or microphone will not connect.
Check this site’s camera or microphone permissions in your browser, confirm the selected device is connected, and check whether another application is using it. Device access also depends on browser support and a secure connection.
An online document or video will not display.
Check your connection and the original link. The provider may restrict embedding or access. For Google documents, check the document’s sharing settings.
How do I keep my classroom safe when clearing browser data?
Download Backup Everything first and keep that file somewhere you can find it. Clearing site data can remove locally saved work. Reset Everything also clears the app’s local data after confirmation.
A regular downloaded backup is the simplest way to keep a separate copy of your classroom.